Conqueror’s Blade is a PVP-focused MMORPG where you control a Hero with a small army and work together with your team to defeat the opposing enemy. More information can be found on their website here and on our review here. This is a list of the top tips that every beginner should know.
If you are interested in starting Conqueror’s Blade, now is a pretty good time since they are running a 50% Exp boost event from now until August 18th as well as a Twitch Drops event until August 12th. For new players, the early game tutorial covers the basics of how to actually play the game and manage your units. Early on you will also be playing against bots which will make killing enemy units a breeze. Unfortunately, once you hit a certain level then you start getting matched against real players. This also gets progressively more difficult as you level up your hero since you will start to be placed against the veteran players with years of experience and end game units.
Tip #1: Spend time trying all of the classes
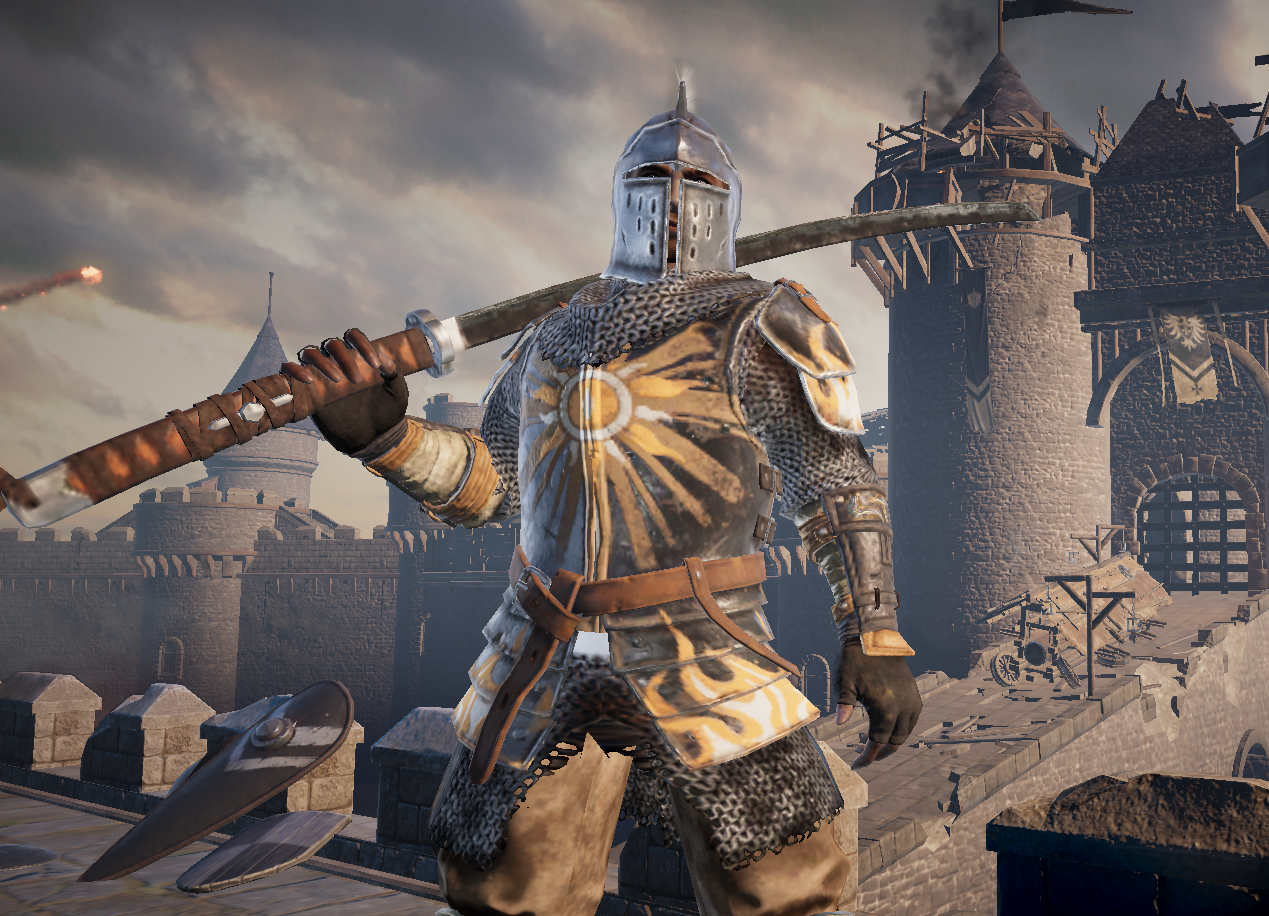
Conqueror’s Blade currently has a total of 11 weapon classes for you to try. Each one has its own unique playstyle, strengths, and weaknesses. Unfortunately with how the game is set up, you don’t really feel the ins and outs of a class until you unlock the higher tier skills. For example, the Poleaxe is an absolute CC machine once you unlock all of the skills – but some of the effects like knocking opponents down don’t appear until you fully max it out. Without the knockdown, you might feel like it is a slow and clunky class that can’t even lock someone down. But the moment you get that first combo going, it is going to feel much much more satisfying to play.
With that in mind, all new players should be open to exploring multiple classes throughout their entire gameplay. It is also important to consider that when you begin playing against higher tier troops, their armour tends to also get tougher. Some classes that excel in the early game might not have the same god-like ability later on. Just keep that in mind and be flexible for long term gameplay!
One caveat is that if you are interested in the Maul class it can be a bit of a pain since you have to switch your seasonal progress to Season 3 in order to unlock it. There is also a fairly long grind involved with completing a ton of missions to fully unlock all of the skills – which in itself isn’t too bad except for a few specific missions that don’t add to gameplay. The more important downside is that while you are unlocking progress on the Maul, you cannot contribute to unlocking this season’s units.
If you are interested in learning to play Nodachi specifically, see the guide listed here.
Tip #2: Join a House
Joining a good house is a great way to find people to play with, learn how to play the game, and it also provides some monetary benefits to help with unit kit cost. A House in Conqueror’s Blade is essentially what you refer to as a guild from other MMORPGs. It is a community that joins together during Territory Wars to fight other Houses and take over settlements. During day-to-day gameplay, most houses tend to also group together for siege/field battles and other events. It really is the best way to get to know others who enjoy this game as well.
If you go on Reddit, you’ll notice that sometimes there is a lot of beef that goes on between some of the houses. For the most part, this is a loud minority and the vast majority of other houses are much more chill and filled with great people. Also do not be afraid to join a more competitive house since they are usually kind to new players as long as you are active and participate in their Territory Wars.
Participating in a House’s Territory War and training for the war is also the absolute best way to develop your strategic skills and map awareness. When you are in the discord chat, there is usually someone who does shot calling for the battles. Listen very closely to their instructions and thought process and try to follow along in your head with your own analysis. Many times they will call out things like “Cav flank north – need one unit of pikes from east to move north” or “exposed ranged at ping, need a cav flank” and you will be expected to follow their instructions. With time, you will begin to learn the flow of combat and be able to prepare your units accordingly.
Tip #3: Max out Pike Militia and Spear Sergeant ASAP (and maybe Woodcutter)
Pike militia is one of the early units you can unlock that will stay relevant in the endgame. When fully maxed out (veterancy middle line), it can deal some serious damage even to some of the more heavily armoured units. It will eventually get replaced with other late game pike units, but it still has a place as a budget filler option. No other low tier unit has the same longevity as this one, so keeping it as part of your warband early on has its benefits.
In terms of how to use them, ideally you would place them slightly behind a shield wall and brace them. This allows your units to be protected from enemy ranged fire while having the pikes poking out in front of the shields to deal damage. They can also sometimes be used semi-offensively by advancing them forward using “X – hold position” and hitting the brace button right when they are within range of enemy troops. Be warned, this can often times get your unit wiped if you mistime it even by a little bit. Definitely prioritize using them in tandem with shieldwalls and not offensively on its own. Furthermore, ranged fire will kill your pike militia very fast and so either place them behind cover or a shield wall.
Spear Sergeant is one of the easiest end game units that you can obtain fairly early on. It is extremely useful in both PvE and PvP situations. The stats are relevant throughout the entire game and can allow you to do very well in Expeditions. It provides both good offence and defence – allowing you to use them as both a shieldwall and a “cover commander” unit. It is also one of the easiest units that you can use for Rebel Camps since it has enough defence to stay alive in Hard camps and can still delete rebel troops.
The woodcutter is my go-to expendable unit for pushing siege towers/battering rams. It is a bit of a meme to be honest, but they do have some uses as suicide infantry after their initial job is done. When fully maxed out, they have the ability to form a column and charge. Their armour penetration is honestly not bad for a unit that is only worth 40 leadership and can potentially take down enemy units worth much more. You don’t necessarily have to aim to max it, but it is definitely a useful unit for when you don’t have leadership room for anything else.
See our list of best starter units and veterancy lines here.
Tip #4: Buy another horse
If you just have the horse you started out with, it is worth investing in at least one more horse. During battles having a horse can literally be the difference between life and death. Having another horse for when your first one dies provides you with additional offensive and defensive opportunities.
On top of the mobility advantage, having a horse also allows you to escape from dangerous situations by allowing you to use them to jump from dangerous heights. They are also a great way for you to sneak up and flank behind enemy ranged units to get rid of them. In some situations, they can also be used to stall for time on the point itself to interrupt enemy capture since it is much more difficult to catch – allowing you to buy your team some valuable time.
Unfortunately, the higher level horse (which is the one you should be getting) can be quite expensive for a new player. I wouldn’t recommend getting more than one additional horse due to this since you are likely to be tight for Bronze early game.
Tip #5: Artillery is your friend – use them
For both siege and field battles, artillery can have a huge influence on winning and losing. Differnt artillery types are good for different things, but generally having a culverin is a good option for general usage. Artillery is generally used to eliminate units, force heroes to back up and heal (ballista head shots can 1 hit kill), and pressure the team to give up advantageous positions.
When attacking, placing artillery with a clear vantage point of the openings and the point itself can apply pressure for your opponent to either push out and eliminate the artillery, give up placing units on the point, or to sacrifice their units to your artillery shots. Regardless of which one you choose, the damage you can do at this stage in the fight will help whittle down their useful units and soften them for advance. If you imagine this like a realistic medieval siege battle, it serves the exact same function to disorient and weaken enemy forces ahead of an infantry push.
When on defence, placing the artillery has a bit more flexibility. Some people like to be more aggressive and place them directly in the open facing the enemy forces to force them back. The risk here is that enemy archers or artillery will have a clear shot at you, but it gives you a chance to retake artillery advantage and control of the point if you can kill their artillery first. In other cases, some people place it adjacent and slightly further away to the chokepoints so that the moment their infantry enter they get an artillery shot to the face. This also slows down their push and enables your own infantry to bring them down easier.
For starters, you should have some artillery from quests that you should be using. When you run out of those, do NOT get them from the artillery NPC – either craft them yourself or buy them from the market. It is much much cheaper this way.
Tip #6: Communicate with your team
When you see suspicious movement or large groups of enemies grouping up and you’re the only one around, use your pings on the map or directly type it out in chat. Not everyone is watching the mini-map as attentively as they should, and giving these reminders helps the team work together. Of course, don’t overdo it and annoy your team – be respectful at all times. It is also helpful to ask your team (very nicely) to bring certain units like more ranged, pike, or shields if you notice a skewed unit composition.
Please also use the chat to coordinate pushes and mention objectives that need to be done. For example, asking your team to push with you onto a flanking supply point helps secure an additional attack direction that can be used to help coordinate the next push. Helping each other and working together is one of the biggest differences between winning and losing teams. Almost all of the winning battles I have been in have involved a cohesive push with everyone working together.
It is extremely important to not be bossy or rude to your teammates – guaranteed they will not listen to you if you are. Just remember, nobody likes the one guy that is 0/4/0 with 12 unit kills calling everybody trash for not pushing with him.
Tip #7: Use your trebuchet very carefully
Rule #1, 2, 3, 4, 5 – never, ever, ever trebuchet your own teammates. Always, always be absolutely sure you are trebucheting the enemy units when you are clicking that button. When you are lining up the shot, know that the lines have to be green for the shots to actually have a chance at landing on the intended location. However, just because it is green doesn’t mean it will land. I don’t know why but occasionally they will still hit buildings as they come down.
One other thing to keep in mind is that if the lines themselves are close to you or your teammates, chances are they will hit them instead of hitting the enemy. This is especially dangerous on the siege towers where new players have a tendency to try to line up a shot in front of the siege tower on the wall. 9 times out of 10 one of the trebuchet shots will land directly on the siege tower itself and wipe out a ton of your units.
That being said, trebuchets are an extremely useful tool for a variety of purposes. They can be used to clear the point, eliminate ranged troops, or even to deny enemy units from reinforcing the point. For beginners, just focus on learning how to line up the shot and try to clear out large groups of enemies if possible. Once you are comfortable with the lining up, knowing the timing of the shots can also help you hit moving groups of enemies. This is most commonly used on chokepoints when you have already started pushing on point and want to prevent enemy units from coming in.
Tip #8: Learn to dodge and know when to run
In Conqueror’s Blade, you dodge by double tapping one of the directional keys. Dodging is always very situational, but in general you should always be attempting to dodge out of enemy CC and spamming dodge when you are already CC’d.
When trying to avoid CC, it takes quite a bit of practice and understanding of other classes and what they can do to you. In general, if a Poleaxe or Maul walks up to you, try to dodge away if you can’t CC them first. If you’re caught by a Poleaxe, most builds tend to run at least 2 CC abilities that can lock you down for a long period of time. By the end of it, their units or other heroes will likely have killed you. The Maul has this insane ability to just grab you and run – basically a death sentence if they have any units or heroes around. Other classes will also have some form of CC ability, but these two are the ones to especially watch out for when you are new.
If already CC’d, some beginners tend to not roll out as soon as they are able to because they think they are still locked down. Spamming the dodge function gives you a better idea of when abilities tend to wear off and gets you into the rhythmn of avoiding damage.
Finally, know that CC is king in this game and running is nothing to be ashamed of. As a new player, you likely will not have the 1v2, 1v3 ability that some veteran players have. Unfortunately, the moment your units begin to die out and you find yourself outnumbered, just run. While you are still learning how to dodge and avoid CC, any sort of number disadvantage opens you up to being CC’d to death. If you try to fight for a bit and spend stamina, you will inevitably run out and not be able to sprint out of danger later on. It is safest at the start of your gaming career to avoid this situation in the first place.
Tip #9: Craft your own equipment
Crafting your own armour and weapons is often times much cheaper and can get you better results than what you see on the auction house. The quest lines should be providing you with a few blue schematics, and the seasonal quests will provide a few more. Crafting your own equipment gives you a chance to proc for bonuses that you would have to pay much more for on the market.
When starting out you might not have enough resources to create your full set. You can either break down horse armour or run expeditions for chests that contain supplies. For dust, you can use your seasonal tokens in the seasonal store for them or try to get lucky with breaking down NPC armour.
For armour specifically, make sure you try to get the full set since the bonuses are pretty good. For weapons it matters a little less if you use ones that you get randomly from playing as long as their stats are not terrible. Later on in the game you can spend more time crafting and reconditioning to get the stats you want.
On a side note, the most valuable armour pieces are the ones with extra Leadership. With extra Leadership you can bring more valuable units to battles and it is a HUGE advantage compared to having a bit of extra damage or armour. Hang onto those pieces even if the rest of the stats are not spectacular.
Tip #10: Complete Specific Seasonal Unit Challenges
Namkhan Archers (Season 2)
Namkhan archers are a Season 2 ranged unit that has very good bleed damage that can significant stack up. They are relevant in every stage of the game and should be your first pick for seasonal unit. The bleed procs in Conqueror’s Blade prevent heroes from healing themselves and also ignores armour. This allows you to rack up quite a few hero and unit kills since most heroes have no built-in lifesteal. It is an overall solid unit that is worth picking up in the early stages of your gameplay.
Condottieri Guards (Season 3)
Condos are one of the best sword and shield units in the game at the moment. They have a good charge and the shield bash abilty helps increase their fighting ability even more. When used appropriately, it can take out some high value units and come out with minimal losses. It is also useful for completing other unit challenges and missions that require a certain number of charge kills or sword infantry kills due to its high damage potential.
Fortebraccio Pikeman (Season 3)
Forts are the units you see in game that have a super tight formation and long pikes. When braced in chokepoints, these units can often immediately delete any hero or unit that walks right in front of them. It can take quite a while to fully unlock these units since they are the purple unit from Season 3, but it is one of the most useful units you can currently use.
A key thing to remember for forts is that you don’t generally need to place them right in the chokepoint. Most players like to place the unit immediately adjacent to it so that the only part that is visible from the enemy’s POV is the extended pikes. This minimizes ranged damage to the unit while still blocking off the doorway.
Janissaries (Season 4)
The janissary unit is a powerful musket unit that was introduced recently in Conqueror’s Blade Season 4. They bring a good combination of damage, fire rate, and accuracy when levelled up. Not only that, but they also have an innate ability to proc a dazed effect which can help slow down advancing enemies. Altogether it is a powerful unit for a newer player to have on the roster and is worth aiming towards as one of the early goals.
That being said, I don’t currently recommend aiming for the Azaps since they are underperforming right now. It also takes quite a while to fully unlock them and the leadership cost is not worth it when compared to other units like Condos. Complete the Janissary Challenges and you should be in a good place.
For more information on the best beginner units and their veterancy lines, see our guide here.
Tip #11: Buy EXP boosts and Schematics in the seasonal store
As you play, the season pass will provide you with free currency that you can spend in the seasonal store. There are quite a few good items that you can get, but for beginners the Hero EXP and the Unit EXP multiplier boost are great ways to accelerate through the early game. Note that there is a separate Unit EXP item that provides straight EXP – might be useful, but the Unit EXP multiplier for battles is more worth the cost.
Having the extra Hero EXP will bring you to Level 60 slightly faster so that the attributes you have will be on par with every other hero. Unit EXP boost will help you max useful early units (Pike Militia) and enable you to focus on levelling higher tier units. Also keep in mind that once a unit is fully levelled, it will no longer take EXP. The recommended option is to max Pike Militia and bring it to every battle as a powerful unit that rakes in kills for other units to benefit from.
After getting EXP boosts, prioritize getting as many blue schematics as you can. This is extremely important for crafting equipment and re-conditioning them later on in the game. Unfortunately, schematics are in very short supply once you use up the ones given in quests. The ones in the market are also very expensive – especially if you are a new player with little extra silver. Even if you do not need them right now, you will definitely need them later in the game. Get as large a stockpile right now while you can and your future self will thank you.
Tip #12: This game is a marathon, not a sprint
Even if you ignore or disagree with everything else I say in this list of tips, just remember that Conqueror’s Blade is about playing long-term. Unless you hardcore grind the game, it will take you at least a month or more to get to endgame heroic units – and much more time to actually max all of your units. Don’t let this game stress you out or burn you out in the first week. Take it slow and do not be afraid to reach out for help from your House or even from Twitch streamers.
It is perfectly normal to not completely finish your weekly or daily quests. If you don’t feel like running out of the fief to do rebels or gather materials then don’t! You can still make perfectly good progress just playing the parts of the game you actually like playing. At the end of the day, Conqueror’s Blade is still a game and one that you should be able to enjoy in your own way.
Conclusion
I hope that this list of tips helps smooth your transition into the game! For any veteran players reading this, please let me know if there are any important tips I missed and I will add them as soon as I can.
If you are a new player, check out our guide for Best Starter Units and our Top 10 Strategy Tips for Beginners! 🙂