Going Medieval is a brand new colony sim/base builder that gives you full freedom to manage a village, build a castle, and defend your people from invaders and wild animals.
If you enjoyed games such as RimWorld and Amazing Cultivation Simulator, you will have a blast with this one as well. This guide will go over several tips for an easier early game and to improve your quality of life!
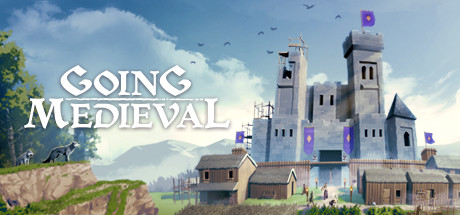
Going Medieval is on sale for 25% off full price at Green Man Gaming until June 11th! Check out our review of Going Medieval if you haven’t purchased the game yet.
1. Re-roll until you have good Marksman, Research, Construction, Culinary, and Botany
Marksman 10 allows one of your starters to use the starting Bow which will be immensely useful for both hunting and fighting early Raiders. It makes a huge difference in providing an additional food source to improve food quality. The early Bow in the hands of a proficient 10+ Marksman on top of a hill/building will make defending early game a breeze.
Research in Going Medieval is how you unlock the vast majority of the game. To put things in perspective, you have no way of creating preserved food or ANY drinks until you research the relevant technologies. Having a decent researcher at the start of the game will allow you to progress at a much faster rate.
Construction, Culinary, and Botany are the most necessary basics in the early game that you will need to create your first house, plant your first field, and cook necessary food. Other skills can be increased later on and are relatively less significant to the survival of your village.
2. Harvest, not cut, Redcurrant Shrubs
The Redcurrant Shrubs that your map usually starts off with will endlessly provide you with food as long as you do not cut them down. Make sure to only use the “Harvest” function and it will support your village until you are able to plant your first crops. This will be especially important once you get your Brewery since the easiest way to create drinks is to use Redcurrant for Wine. Preserve the shrubs and it will pay off later on!
3. Dig Underground for Food Storage
As of Early Access Release, there are no methods to cool down food or create any sort of makeshift fridge. Only way to preserve food is to reduce temperature by storing materials underground. All you have to do is mine downwards, build a set of stairs, and mine downwards a second time in a square area. This is usually enough to lower the temperature by a few degrees and extend the longevity of your food and raw supplies.
4. Prioritize Researching Furniture, Brewing, and Preserved Food
Furniture research will quickly give you access to a better bed that can give your villagers improved sleep and will not have to be replaced later on – giving you better flexibility for your room decorations.
Brewing is an absolute necessity since there are no naturally occurring sources of hydration for your people. This means that they will have no way to alleviate thirst once you run out of your original supplies and give you a hefty mood debuff. Doing the research early will give you more time to build up your stores since the brewing process also takes quite a long time.
Finally, preserved food (through Smokehouses) is necessary for winter time in the majority of games since it is unlikely you will have enough raw supplies. Like with Breweries, Smokehouses take time to create preserved meat and an earlier start will set you up in a much more stable position going forward.
5. Build Multiple Breweries and Smokehouses
Breweries and Smokehouses take time to finish creating food/wine after being loaded with supplies by your villagers. Creating multiple of each is necessary to fill your storehouses in a timely fashion. I’ve found that 2 Breweries and 3-4 Smokehouses is typically enough to get 5-6 villagers through the winter. They are fairly easy to create and relatively low maintenance as well as being 100% worth the investment.
6. Create Both Shrines and a Backgammon Table
Easiest way to cover all of your bases and provide support for entertainment/religious needs is to create both Shrines and a Backgammon table early on. It is a quick and inexpensive way to ensure that you don’t get hit with any mood debuffs from a lack of necessities. Regardless of what your villagers religious preferences, both Shrines will be enough to cover everyone.
7. Use Beams to Create Roofs
Depending on how large you want to make your Castle/Mead Hall/Main Building, your roof may not be able to extend all the way across. From my few hours of playing, it seems that roofing only extends to a maximum of approximately 10 units. Over that distance, you can use a beam to create an intermediate place to end the roofing before starting the next segment. This will allow you to build a more uniform roof without having to set down large walls in the middle of your beautiful building.
Likewise, be aware that beams only extend 10 units – meaning that if you have a 11×11 square building, you will NOT be able to create a beam. Keep these two requirements in mind while you are planning out your building!
8. Build a Storage with Roof and Flooring
Non-food materials typically degrade due to being on the ground outdoors and from being uncovered. Make a quick shed by building 4 pillars with a roof and full flooring to extend the longevity of your items. It is not actually necessary to build out the full walls at this point in time – just the 4 corners is enough!
Later on when you have your workshop fully set up, you can extend the roof of the workshop and place a storage area underneath there as well if you do not want clutter in the workshop itself. This helps manage space more efficiently and gives you more options going forward.
9. Build a Watchtower for your Archers
Like briefly mentioned in Tip #1, having a good archer is a huge bonus to fending off invaders in the early game. Archers having the high ground gives a bonus to their accuracy and fighting abilities – on some maps you may have the opportunity to build your base on a mountain. In case you do not, it is worth investing in a Watchtower made up of a simple square building with stair access to the roof. This enables you to station an archer up there when invaders show up which will give you bonus attack power while your melee fighters keep them busy.
Alternatively, if you are focusing on building one large structure, you can extend the flooring on one of the levels and build barricades on the perimeter to create makeshift towers. This may require some more planning ahead but will be another option to protect your main base.
10. Always Accept New Members
Having additional people significantly increases your base building speed and most new assets will supplement your early group’s abilities. If you are afraid of a fight, follow the above tips and you should have no difficulty with handling the early invaders. One or two archers on your side on elevated buildings can effectively decimate the invasions before they even reach your melee troops.
Bonus QoL Tip: Constantly Use Q, E, X and Z When Building
This may just be an early access issue, but it can be incredibly easy to mess up your building placement especially when you are building on multiple floors. Making good use of the rotate and elevate buttons will significantly reduce your chances of making an error.
Follow us on Twitter and Facebook for updates on our guides and reviews
I stream occasionally on Twitch here – come by and hang out!